Buy-or-wait check
PEI Plate Cleaning Guide
Most PEI plate problems are either contamination, wrong first-layer pressure, material release risk, or a damaged surface. Wash and test first; replace the sheet only when the failure follows the same physical area after cleaning.
Independent third-party notes. Verify firmware, heater, electrical, and vendor-specific work against official documentation for your exact printer.
Quick Readout
Most PEI plate problems are either contamination, wrong first-layer pressure, material release risk, or a damaged surface. Wash and test first; replace the sheet only when the failure follows the same physical area after cleaning.
Pick what you see
Pick the PEI Plate Cleaning Guide branch
Choose the visible evidence or log clue that matches first. The card below keeps the next move to one test and one variable.
First-layer lines are separate, round, or easy to lift.
- Likely cause
- Nozzle is too high, plate is contaminated, or bed temperature is too low.
- First test
- Run the five-patch first-layer test after washing the plate.
- Change only this
- Lower Z offset in 0.02 mm steps or clean the plate, not both.
- Parameter range
- 0.02 mm steps; rarely more than 0.10 mm from known-good
- Stop when
- Lines touch without ridges or scraping.
- Verify with
- Patch line shape and corner adhesion.
Pick the exact path
Most failed fixes go wrong when they start from the wrong branch.
Use this when the failure appears on Smooth PEI or the closest matching setup.
- First test
- Run the five-patch first-layer test after washing the plate.
- Change only this
- Lower Z offset in 0.02 mm steps or clean the plate, not both.
- Stop when
- The repeat test clearly improves or points to a different branch.
Use this if the symptom started after a nozzle, spool, plate, slicer, firmware, or maintenance change.
- First test
- Restore the last known-good context or isolate only the recent change with one small repeat test.
- Change only this
- Undo or isolate the recent change; do not retune the whole profile.
- Stop when
- The repeat test clearly improves or points to a different branch.
Use this when the first proof test looks the same after one safe variable change.
- First test
- Repeat the same test once to rule out a bad slice or one-off print.
- Change only this
- Switch branch instead of stacking another setting.
- Stop when
- The repeat test clearly improves or points to a different branch.
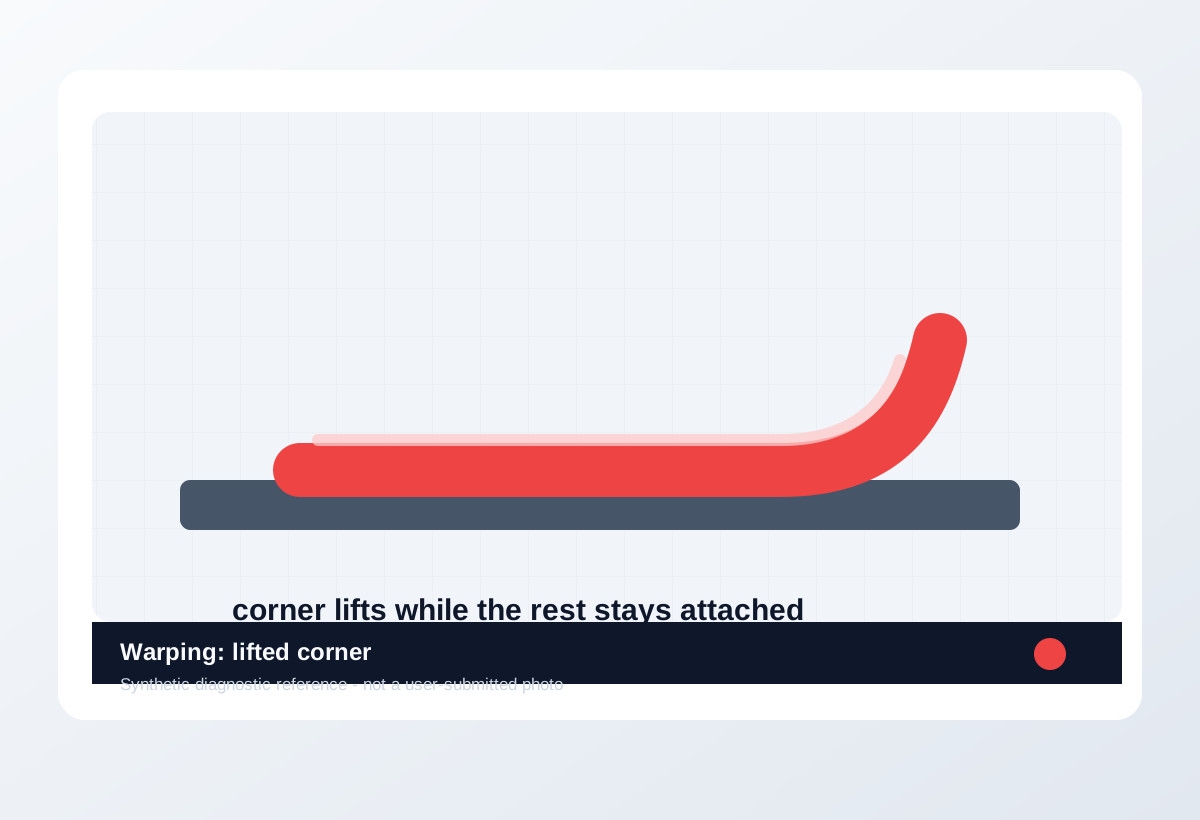
Visual diagnosis
Match the visible pattern before changing settings.
Synthetic diagnostic reference or structured visual guide; confirm with the page test before treating it as proof.
- PEI Plate Cleaning Guide repeats on the same printer, material, or print condition.
- The visible pattern changes when one branch variable changes.
- The symptom can be reproduced with a small test instead of a full model.
- Glass, garolite, BuildTak-style, or specialty plates with different care rules.
- Fixing under-extrusion, wet filament, or nozzle clogs that only look like adhesion issues.
- Replacing a plate before washing and Z offset are verified.
- Poor first-layer squish
- PETG over-adhesion mistaken for good grip
- Geometry stress on one oversized model
- Where the defect starts and whether it repeats at the same location.
- Whether the texture is smooth, rough, lifted, thin, blobby, or shifted.
- What changed recently: material, nozzle, plate, firmware, slicer, or printer maintenance.
- The exact slicer value that caused it.
- Whether the spool is dry, the nozzle is worn, or the config is correct.
- That a purchase is needed before the same small test is repeated.
Original visual references
Synthetic examples for fast pattern matching.
These are Print Fixes synthetic diagnostic references, not user-submitted photos. Use them to compare shape and location, then confirm with the test or log evidence on this page.
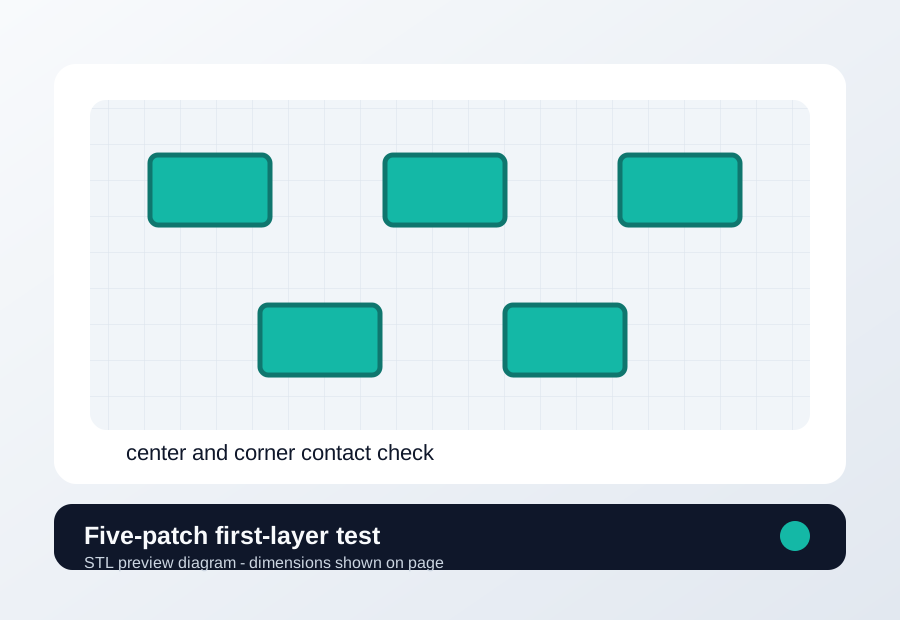
Download a quick test
First layer five-patch test
Use when Z offset, plate cleanliness, or bed area is part of the diagnosis.
- File
- STL
- Typical time
- 8-12 min
- Material
- Same material that failed
- Dimensions
- 120 x 90 x 0.3 mm
- Footprint
- 120 x 90 mm
- Height
- 0.3 mm
- Layer height
- 0.20 mm unless the page says first-layer only
- Infill
- 0%
- Walls
- 2
- Supports
- Off
- Speed
- Use current profile for baseline, then change only the proven variable
- Material and spool
- Nozzle size
- Bed surface
- Every slicer value except the one variable being tested
- First-layer height only
- No brim for the baseline
- Keep bed temperature unchanged for the first comparison
Recommended Checks
0/6 doneVerification
- A cleaning fix should make patches more consistent without changing slicer settings.
- A Z fix should change line squish evenly across the test area; use 0.02 mm steps and rarely move more than 0.10 mm from a known-good setup.
- A damaged-plate signal stays in the same physical spot when the model is moved or rotated.
- A release-layer win protects PEI from over-adhesion while still allowing the part to release after cooling.
Only if the test points here
Tools and supplies for the proven branch
Plate cleaning and release kit
Wash the plate, print the same first-layer patch in two bed areas, then compare release and line shape.
- Buy signal
- The failure follows a scratched, polished, contaminated, or PETG-sensitive surface after Z offset is already sane.
- Skip if
- The same patch fails in every area before cleaning or Z offset is verified.
- Save evidence
- Bottom photo, plate-area photo, material, bed temperature, and whether the patch moved with the plate area.
Clean first, then replace or add release only if the failure follows the plate surface.
- PEI-safe cleaner or dish soap workflow
- Release layer only for PETG-risk surfaces
- Replacement sheet that matches your printer size and magnet system
- A new plate for a dirty plate
- Release agent for PLA that already will not stick
Replacement PEI build plate
Print the same patch in a good area and suspect area after washing, with Z offset unchanged.
- Buy signal
- The defect follows one physical surface area or PETG has already torn/coated the sheet.
- Skip if
- Every area fails before washing, Z offset, and bed temperature are proven.
- Save evidence
- Plate close-up, two patch locations, material, bed temperature, and cooldown result.
Replace the sheet only when the failure follows the surface, not the model or Z offset.
- Correct printer size
- Magnetic compatibility
- Smooth vs textured surface matched to material
- Vendor release guidance for PETG
- Replacement sheet for poor bed mesh or dirty plate
Print Fixes may earn from qualifying purchases when commerce links are configured. Diagnostic steps stay independent: buy only when the failure evidence points to the part.
Field guide
Follow the branch that matches your print
First-layer lines are separate, round, or easy to lift.
- Likely cause
- Nozzle is too high, plate is contaminated, or bed temperature is too low.
- First test
- Run the five-patch first-layer test after washing the plate.
- Change only this
- Lower Z offset in 0.02 mm steps or clean the plate, not both.
- Verify with
- Patch line shape and corner adhesion.
- Stop when
- Lines touch without ridges or scraping.
The nozzle plows ridges, leaves transparent patches, or scratches the surface.
- Likely cause
- Z offset is too low or the nozzle/bed contact changed.
- First test
- Raise Z offset by 0.02 mm and repeat one patch.
- Change only this
- Change only Z offset.
- Verify with
- Same patch, same plate area.
- Stop when
- Ridges disappear while adhesion remains.
Center works but one corner or side fails differently.
- Likely cause
- Mesh, gantry, plate seating, or local plate damage.
- First test
- Move the same patch to two bed areas.
- Change only this
- Change only mesh/tilt/plate seating after the location test.
- Verify with
- Patch location comparison.
- Stop when
- The failure no longer follows one bed area.
The failure started after a nozzle, hotend, plate, or profile change.
- Likely cause
- The recent change moved nozzle height, surface behavior, or slicer baseline.
- First test
- Undo or isolate the recent change with one patch.
- Change only this
- Change only the variable touched during maintenance.
- Verify with
- Before/after patch photo.
- Stop when
- The patch returns to known-good line shape.
PETG or another material bonds too aggressively or damages PEI.
- Likely cause
- Release risk, too much squish, hot bed, or wrong plate surface.
- First test
- Let the plate cool fully and run a small release patch.
- Change only this
- Change only release layer, Z, or bed temperature.
- Verify with
- Release force and bottom surface.
- Stop when
- Part releases without tearing coating.
Concrete Parameter Range
| Setting | Start | Range | Change when | Stop when | Too far looks like |
|---|---|---|---|---|---|
| Z offset | Known-good value | 0.02 mm steps; rarely more than 0.10 mm from known-good | Lines are separated, ridged, or the nozzle was changed | Patch lines touch without scraping | Transparent ridges, nozzle marks, or poor release |
| First-layer speed | Current profile | 20-30 mm/s troubleshooting range | Lines do not settle or corners lift early | Patch lays down consistently | Too slow can overheat small details or hide flow issues |
| Bed temperature | Material baseline | PLA 55-65 C, PETG 70-85 C, ASA/ABS 90-110 C | Adhesion or release branch points to bed heat | Adhesion improves without over-bonding | PETG over-adhesion or elephant foot |
| Plate cleaning | Current state | Dish soap wash, rinse, dry; avoid fingerprint test contamination | Failure follows plate area or adhesion suddenly changed | Patch behavior becomes repeatable | Excess chemicals or abrasive cleaning damage surface |
Material / Machine Differences
Wrong Turns
Stop tuning when
Do not keep chasing perfection after the signal is clear.
- The same small test improves after one documented change.
- The symptom turns into a different failure family; switch branches instead of stacking edits.
- A safety, heater, wiring, or firmware warning appears; stop printing and use the safe diagnostic path.
Common setups
Jump to the branch that matches your machine or material
Copy before changing more settings
PEI Plate Cleaning Guide diagnostic brief
Fill this out after the first test so the next branch is based on evidence, not memory. The useful case is the one where only one variable changed.
Page: PEI Plate Cleaning Guide
Printer:
Slicer:
Firmware:
Material / brand / color:
Nozzle size / material:
Bed surface:
Exact symptom or error text:
Recent change:
First test run:
One variable changed:
Result:
Next branch:Still not matching?
Jump to the next likely diagnosis
Problem Pattern
The print will not stick, sticks only in some areas, releases mid-print, or PETG/TPU sticks too hard to PEI. The goal is to decide whether the fix is cleaning, Z offset, release agent, or a replacement plate.
Likely Causes
- Fingerprints, oil, glue residue, dust, or filament residue are blocking adhesion.
- First-layer Z is too high or too low, making the surface look like the problem.
- PETG or TPU is bonding too aggressively and needs a release layer rather than more squish.
- The PEI coating is worn, polished, gouged, or damaged in the exact area where the patch fails.
- The bed is clean but uneven, so center and corners behave differently.
Print Context
- Page type
- surface diagnosis and buy-or-wait decision
- Best first move
- Wash the plate, avoid touching the print zone, then run a five-patch first-layer test.
- Good buy signal
- The failure follows a scratched, polished, or damaged plate area after cleaning and Z are verified.
After the test
Use the result, do not keep changing random settings.
If one check clearly changes the print, repeat that exact test once before moving on. If nothing changes, switch diagnosis instead of stacking more slicer edits.
Warnings
- Do not use harsh solvents, abrasives, or scraper force unless your plate maker allows it for that specific surface.
- PETG can bond too strongly to PEI; more first-layer squish can damage the sheet.
- IPA can remove light residue, but dish-soap washing is often better for skin oil and hidden film.
- Never pull a strongly bonded part from a hot flexible plate if the material normally releases after cooling.
- First-layer adhesion problems on smooth or textured PEI.
- Deciding whether cleaning supplies, release agent, or a replacement plate is justified.
- Glass, garolite, BuildTak-style, or specialty plates with different care rules.
- Fixing under-extrusion, wet filament, or nozzle clogs that only look like adhesion issues.
More traps to avoid
- Touching the cleaned plate in the print zone before the test.
- Adding glue to fix PLA non-adhesion before washing and Z offset are checked.
- Using PETG on PEI with too much squish and no release layer.
Bench Note
Plate type: smooth / textured / other
Material:
Washed with dish soap: yes / no
Patch result center:
Patch result corners:
Does failure follow a plate spot?:
Release layer tested?:
Decision: clean / tune Z / add release / replace plate
FAQ
Should I use IPA or dish soap on PEI?
IPA can help with light residue, but warm water and plain dish soap is the better first reset when fingerprints or oils are suspected.
When should I replace a PEI plate?
Replace it when the same cleaned physical area keeps failing after Z offset, bed temperature, and mesh are verified.
Why does PETG stick too hard to PEI?
PETG can bond aggressively to PEI, especially with too much first-layer squish. Use a release layer or the printer maker's recommended surface.